Windows 11 It is an operating system that has improved a lot since its launch in 2021, highlighting a renewed interface, a redesigned Start menu, and greater integration with the cloud. In addition, Microsoft Copilot, powered by artificial intelligence, was recently incorporated.
Despite these advances, It cannot be overlooked that perfection is not an attribute of this systemsince it usually presents some errors that affect productivity, such as error loading troubleshooter.
It’s ironic that a tool designed to address core Windows problems can also contain bugs. In other words, the function intended to solve problems may itself be buggy, a palpable irony in Microsoft’s operating system.
It’s important pointing that This error can occur for various reasons., such as corrupted files, incorrect configurations, or incompatibilities with third-party software. Although the situation may be frustrating, there are solutions to fix this error and restore the functionality of the troubleshooter.
Run the troubleshooter from settings
The troubleshooter that comes built into Windows helps you solve the most common system problems. To access them, you can use the dialog box Executebut if this fails, you can open the tool from the application Setting.
To do this, simply press the keys Windows + ithen select Systemsearch among the options for the option Solve problems and then click on Other troubleshooters.
A new section will open with a list of all the troubleshooters available on your computer, you can choose the one that suits your problem and click Execute. Here, simply follow the on-screen instructions to complete the process.
Restart Windows services
It is important to mention that built-in troubleshooting depends on certain Windows services to function correctly. Therefore, if these services fail or are interrupted, an error message may be displayed.
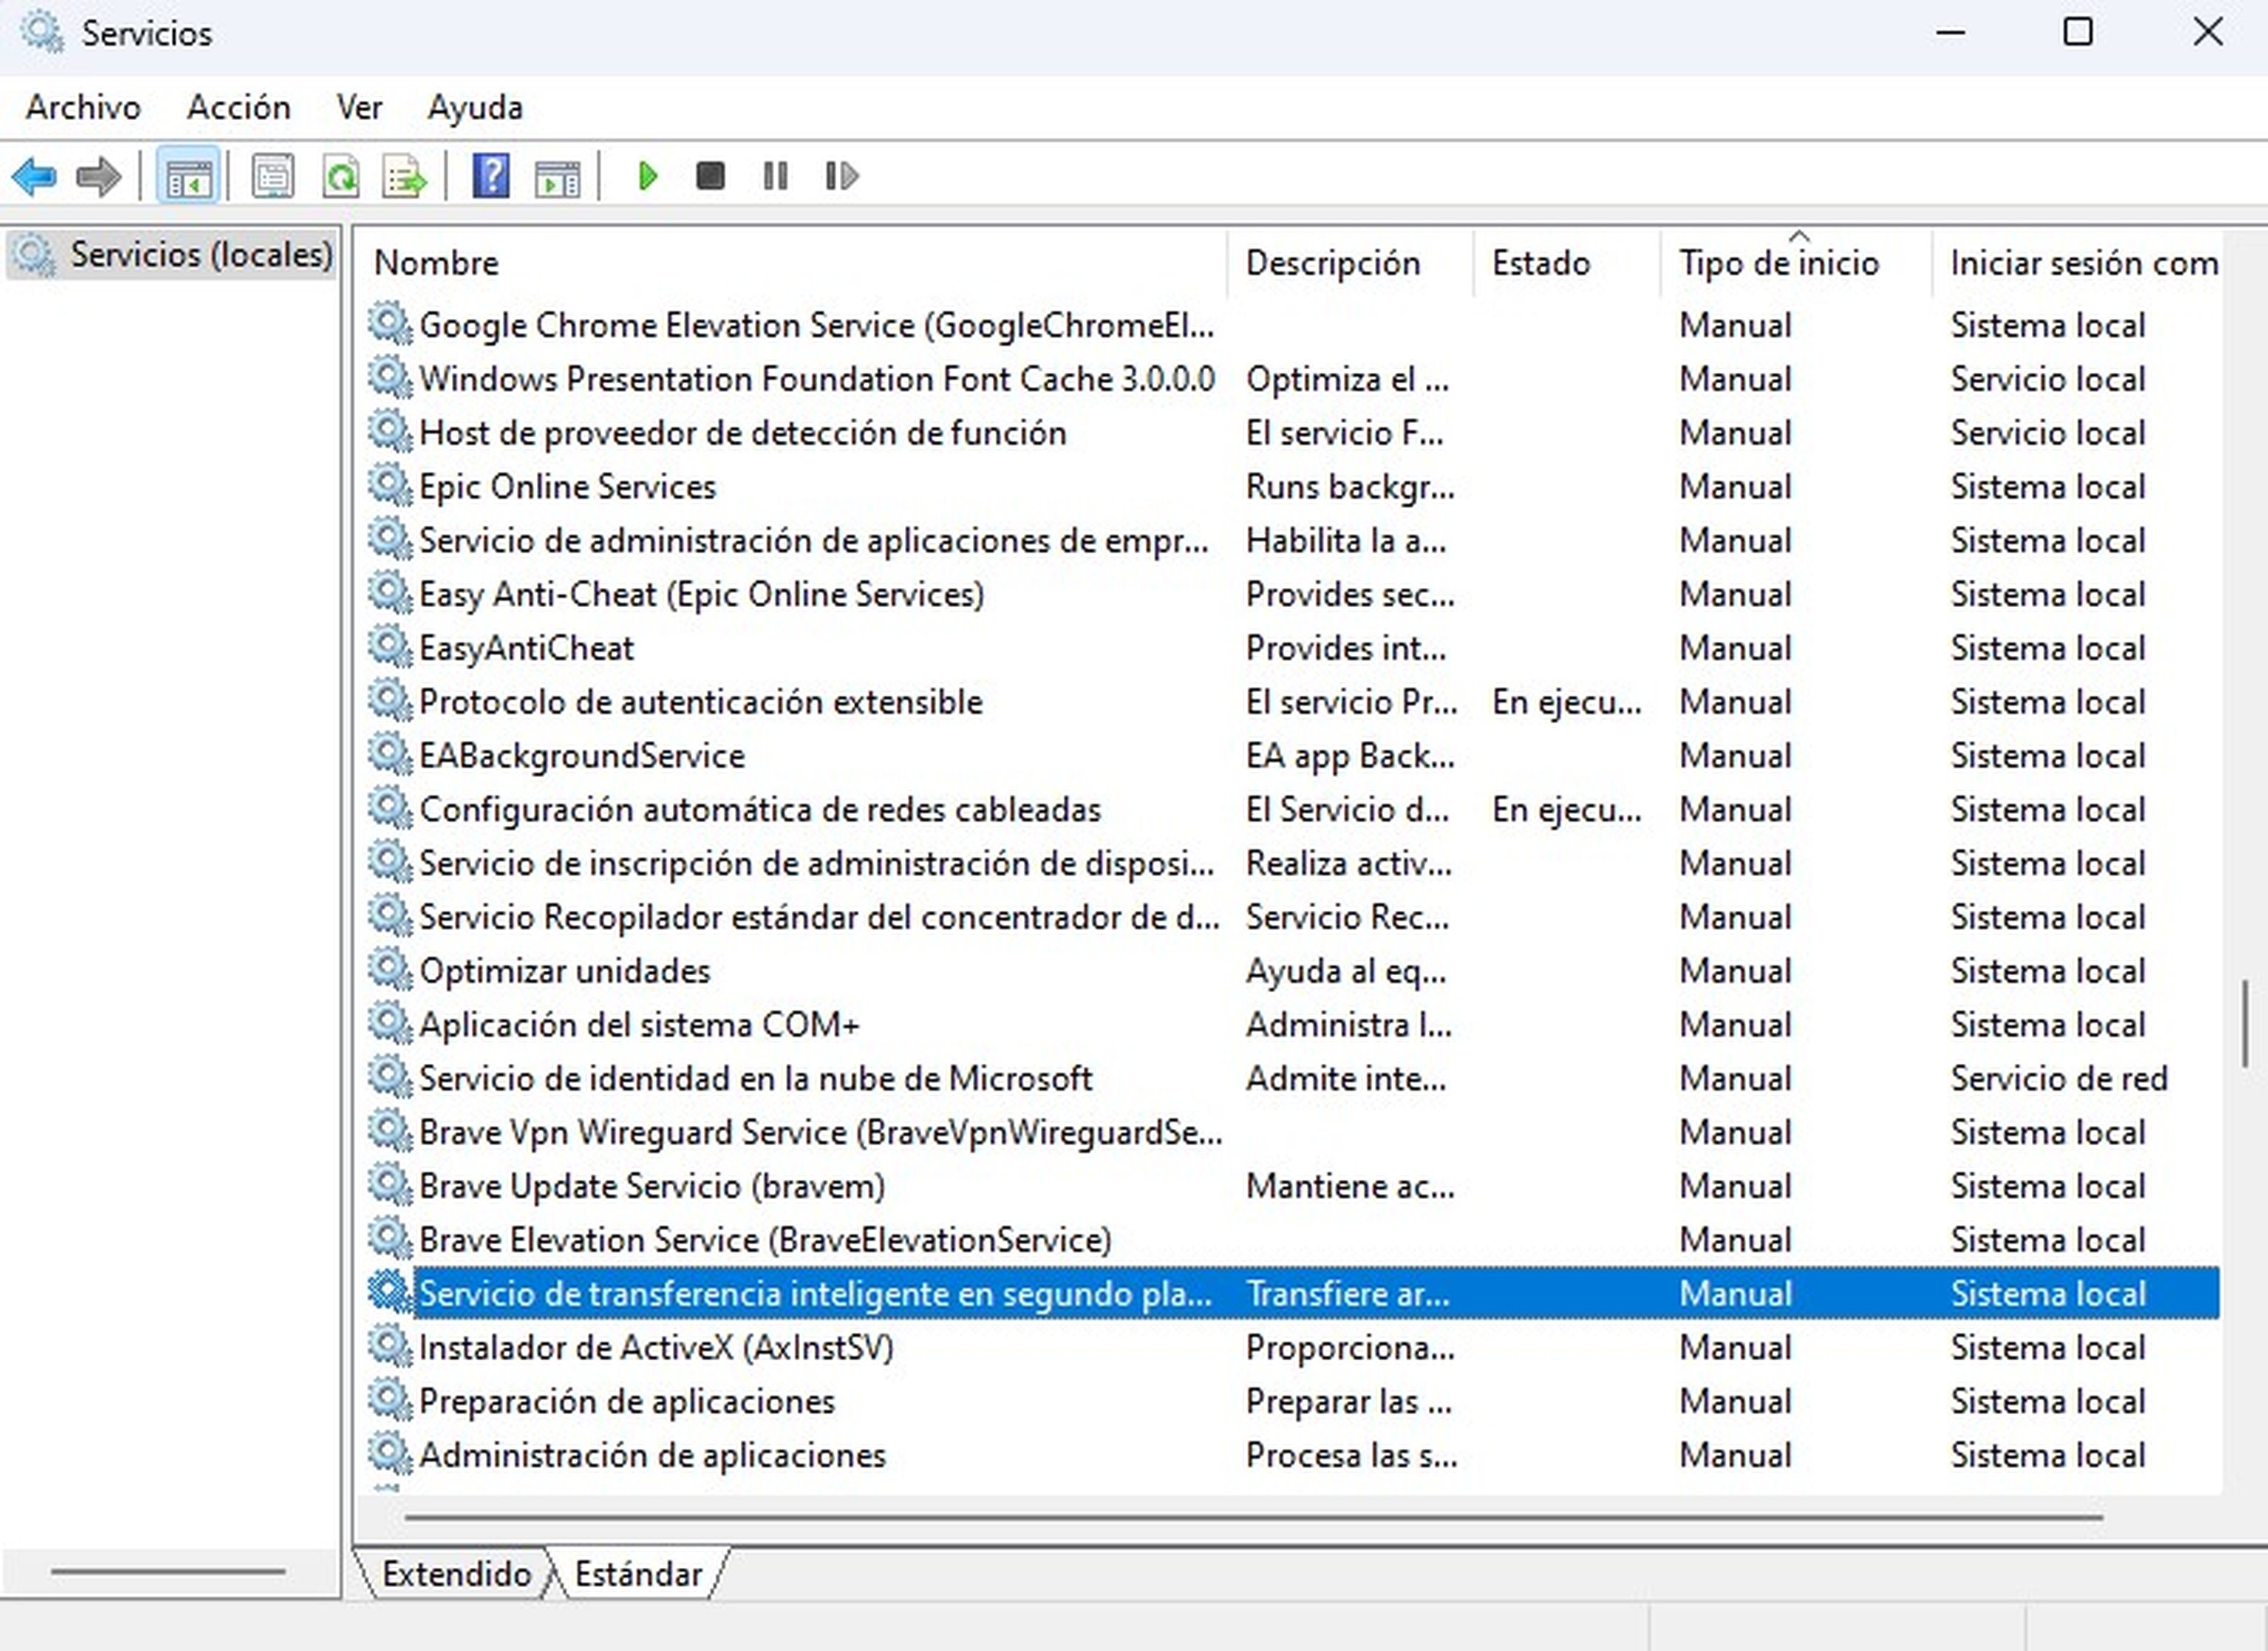
To solve this problem, press the key Windows + R to open the Run box. Then, in the space provided, write services.msc and press Enter. The Services window will open where you have to search for the called service Intelligent background transfer service.
Right click on the option and choose Restart. Then close the window Services to finish the process. In the end, this action should fix any issues related to the Services Needed error for the built-in troubleshooters in Windows 11.
Repair system files
If the Windows troubleshooter is not working properly, it may be because your system files are corrupted. In this case, you can use the tool System File Checker (SFC) which is integrated into Windows.
This tool finds and repairs system files that are corrupted or missing. To use it, follow these steps:
- In it start menu type Command Prompt.
- Right click on the result and choose Execute as an administrator.
- If the message appears User account control (UAC), click Yeah.
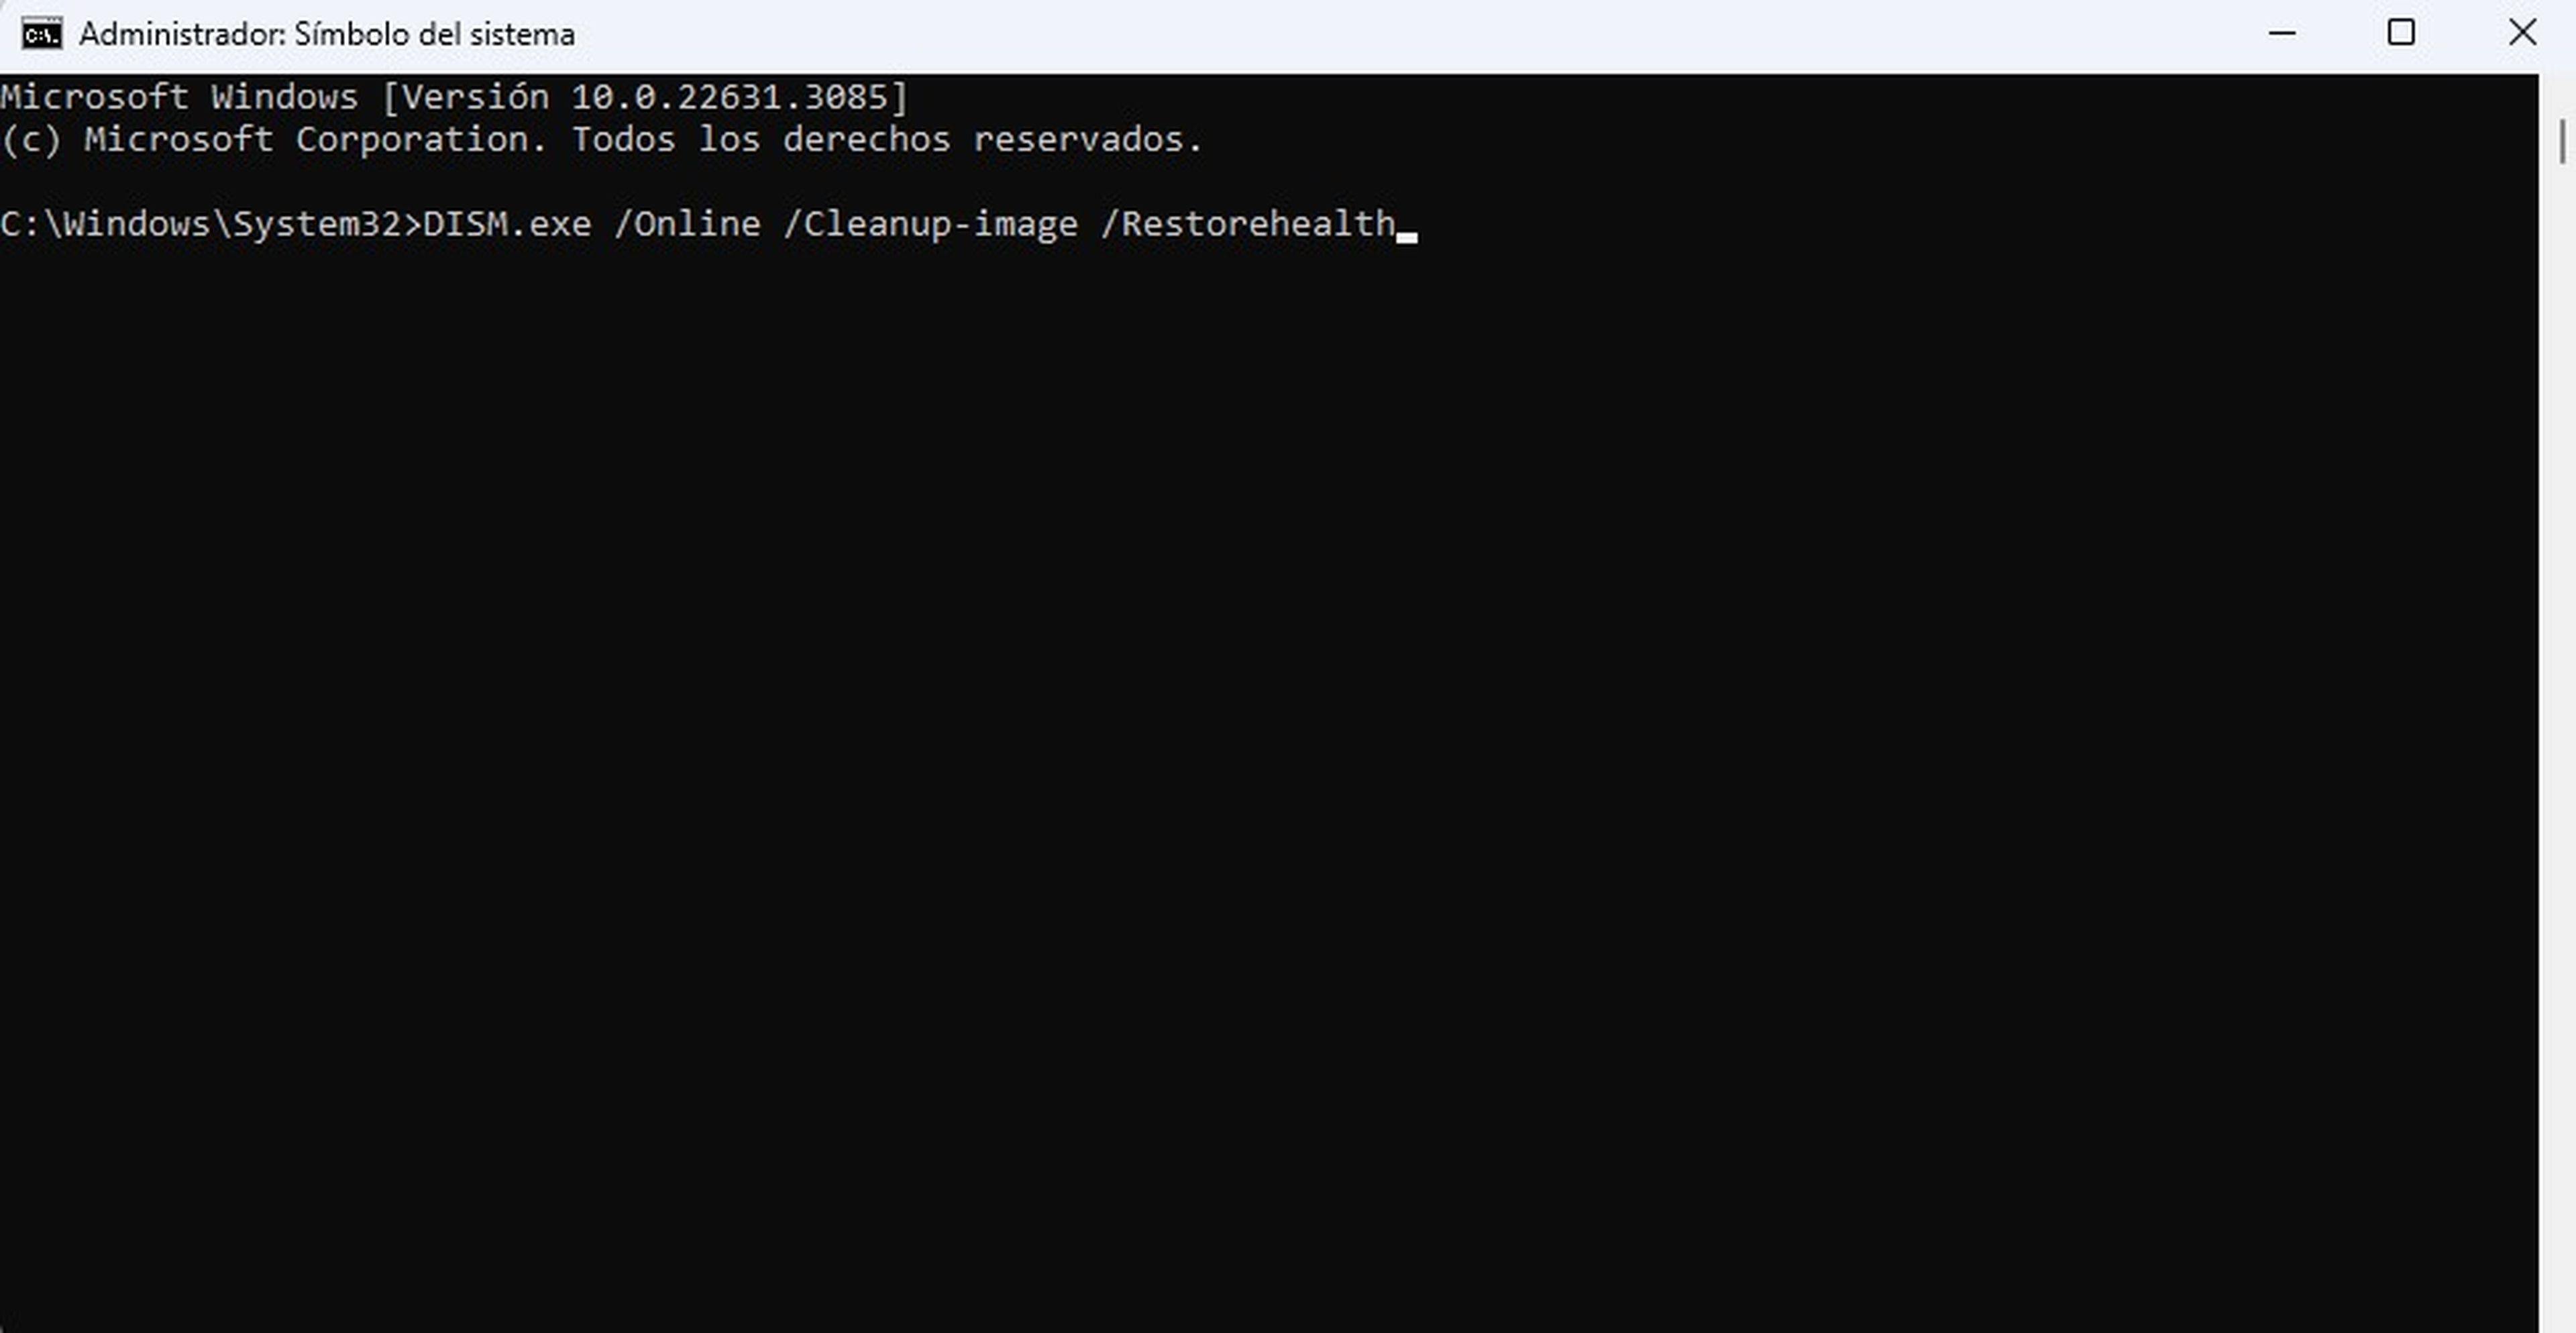
- At the command prompt, type the following command and press the Enter key. This command will download the files needed to repair system files: DISM.exe /Online /Cleanup-image /Restorehealth.
- Then, type the following command and press the Enter key. This command will start scanning and repairing system files: sfc /scannow.
- When the process is finished, restart your PC.
Open the troubleshooter in safe mode
Safe mode is a Windows feature that allows you to fix problems caused by third-party applications that interfere with the normal functioning of your computer.
When you boot into safe mode, Windows only loads the files necessary to run the operating system, making it easy to identify and remove problematic programs or drivers.
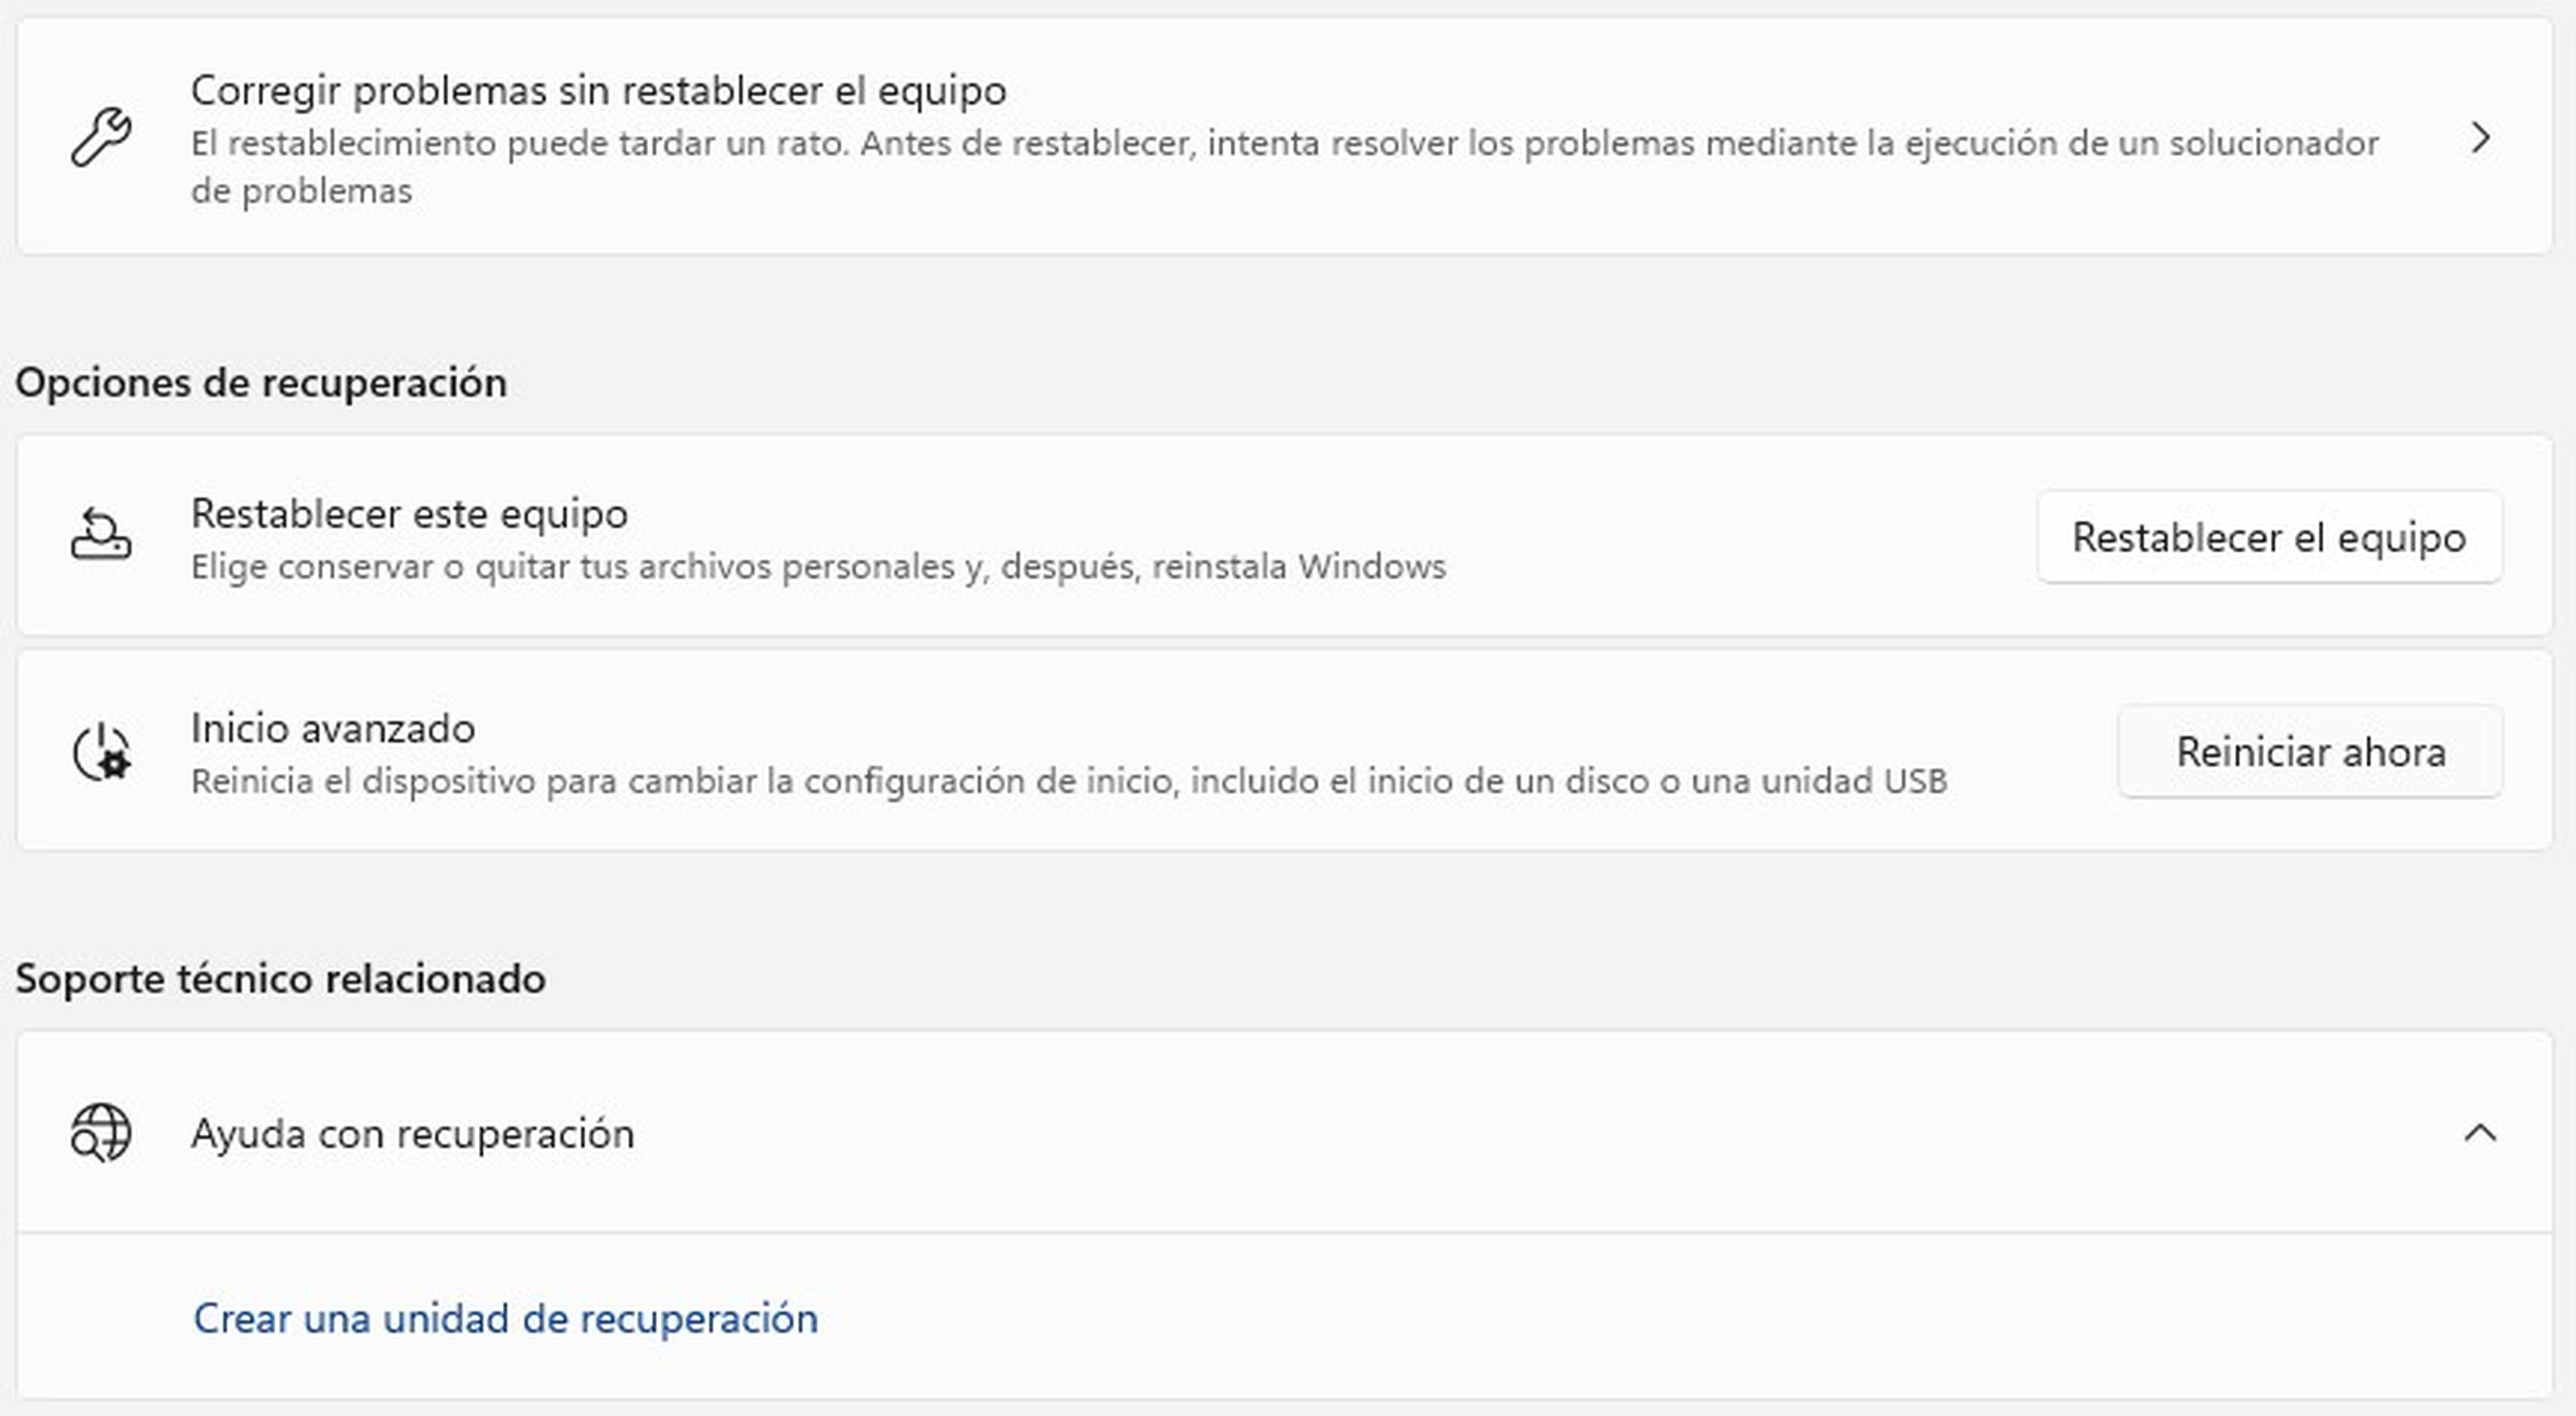
In this sense, you can take advantage of this function to correct the error when loading the troubleshooter. Press the keys Windows + ithen select System, search and click on Recovery and then in Recovery optionsChoose Advanced Start and Restart now.
When the computer restarts, you can run the troubleshooter successfully. If the tool works properly, it means that some third-party application was causing the problem.
Reset Windows 11
One option to solve the problems on your PC with Windows 11 is to reset it to its original state. This will remove any corrupted settings or files that may be causing the error, but it is a drastic measure that should be saved for when all else fails.
To perform a factory reset, follow these steps: Open the Setting and select System. Click Recovery and then in Reset this computer. Choose whether you want to keep or delete all your personal files, then follow the on-screen instructions.
After resetting your computer, you will have to reinstall all the applications you used before. However, the troubleshooting tool should work correctly with default Windows settings.