If you want to record audio on your computer, whether for a voice memo, a podcast, recording videos and other similar activities, in Windows 11 you have two highly effective methods to carry out this task.
The highlight is that you don’t need to invest in expensive professional programs or other paid solutions.
The first is through the default tool included in the Windows operating system, while the second involves the use of a third-party program, which is free and open source.
Record audio from the Windows Sound Recorder app
As we already mentioned, Windows 11 offers a built-in feature for audio recording. Although it has basic options, it fulfills its objective perfectly.
It’s about the application Sound recorder, and one of its most interesting features is that it supports multiple audio formats, as well as quality options. In this way, if what you are looking for is a simple and easy-to-use app, this option is more than enough.
To use it, simply go to the Windows 11 search bar, type Sound recorder and select the program. It should be noted that if you have several microphones connected to your computer, click at the bottom left and select the microphone you want to use.
Once configured, simply click the red button or press the keys Ctrl+R to start recording. To stop it and save the audio, you can use the button Stop recording wave Esc key.
Recordings are organized in the left sidebar, and to access the audio file, simply right-click and select Show in folder. This way, you can edit the file with another program or integrate it directly into your projects.
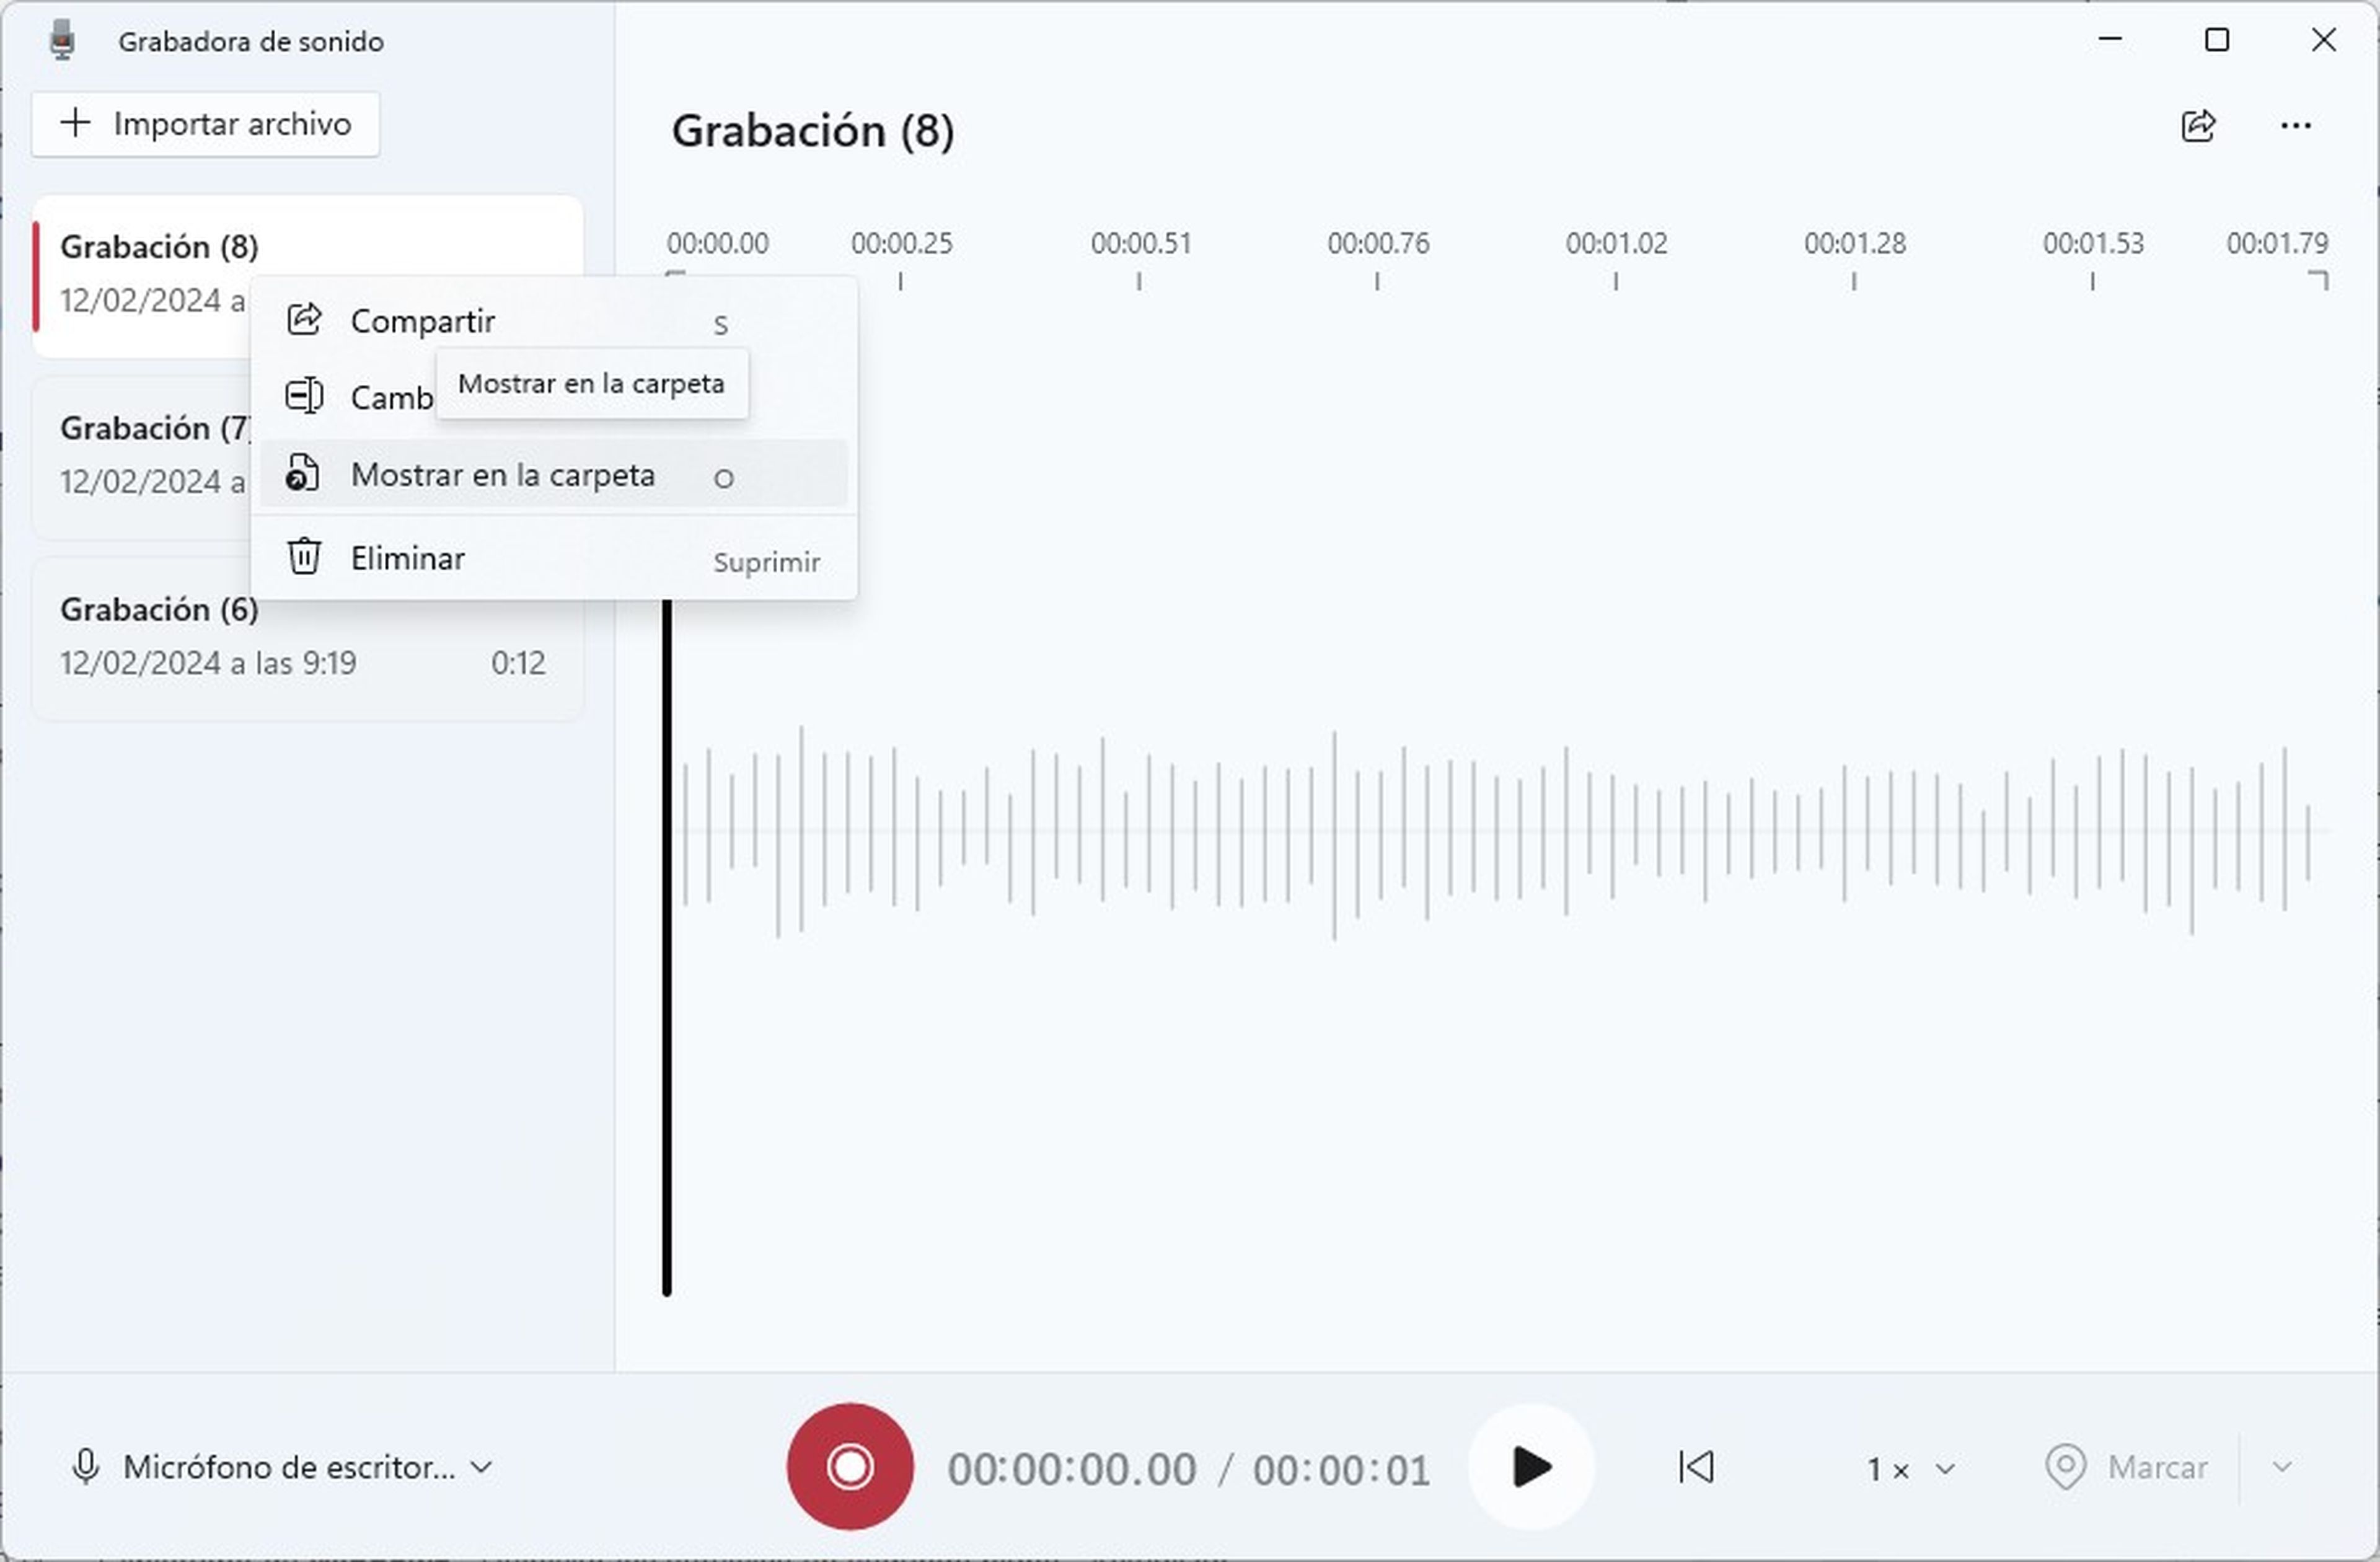
It is important to note that the application saves all recordings in AAC format, but if you want to change to another format you can do so easily. In the upper right corner of the app select the three dots and then click Setting.
A new section will open where you will find the option Recording format, click and the different formats will be displayed, including Mp3, WMA, FLAC and WAV, select the one that suits your preferences. From there you can also choose the audio quality.
Record audio on Windows for free with Audacity
Audacity is a free and open source program that allows you to record and edit audio quickly and easily. It is a versatile tool that can be used for a wide variety of tasks, such as adding effects or converting audio files to different formats, such as Mp3, WAV and OGG.
If you want more advanced functions to record audio, this application is an excellent option, since you can download it for free from its official website. To record your audio, follow these steps:
- Download and install Audacity from its website.
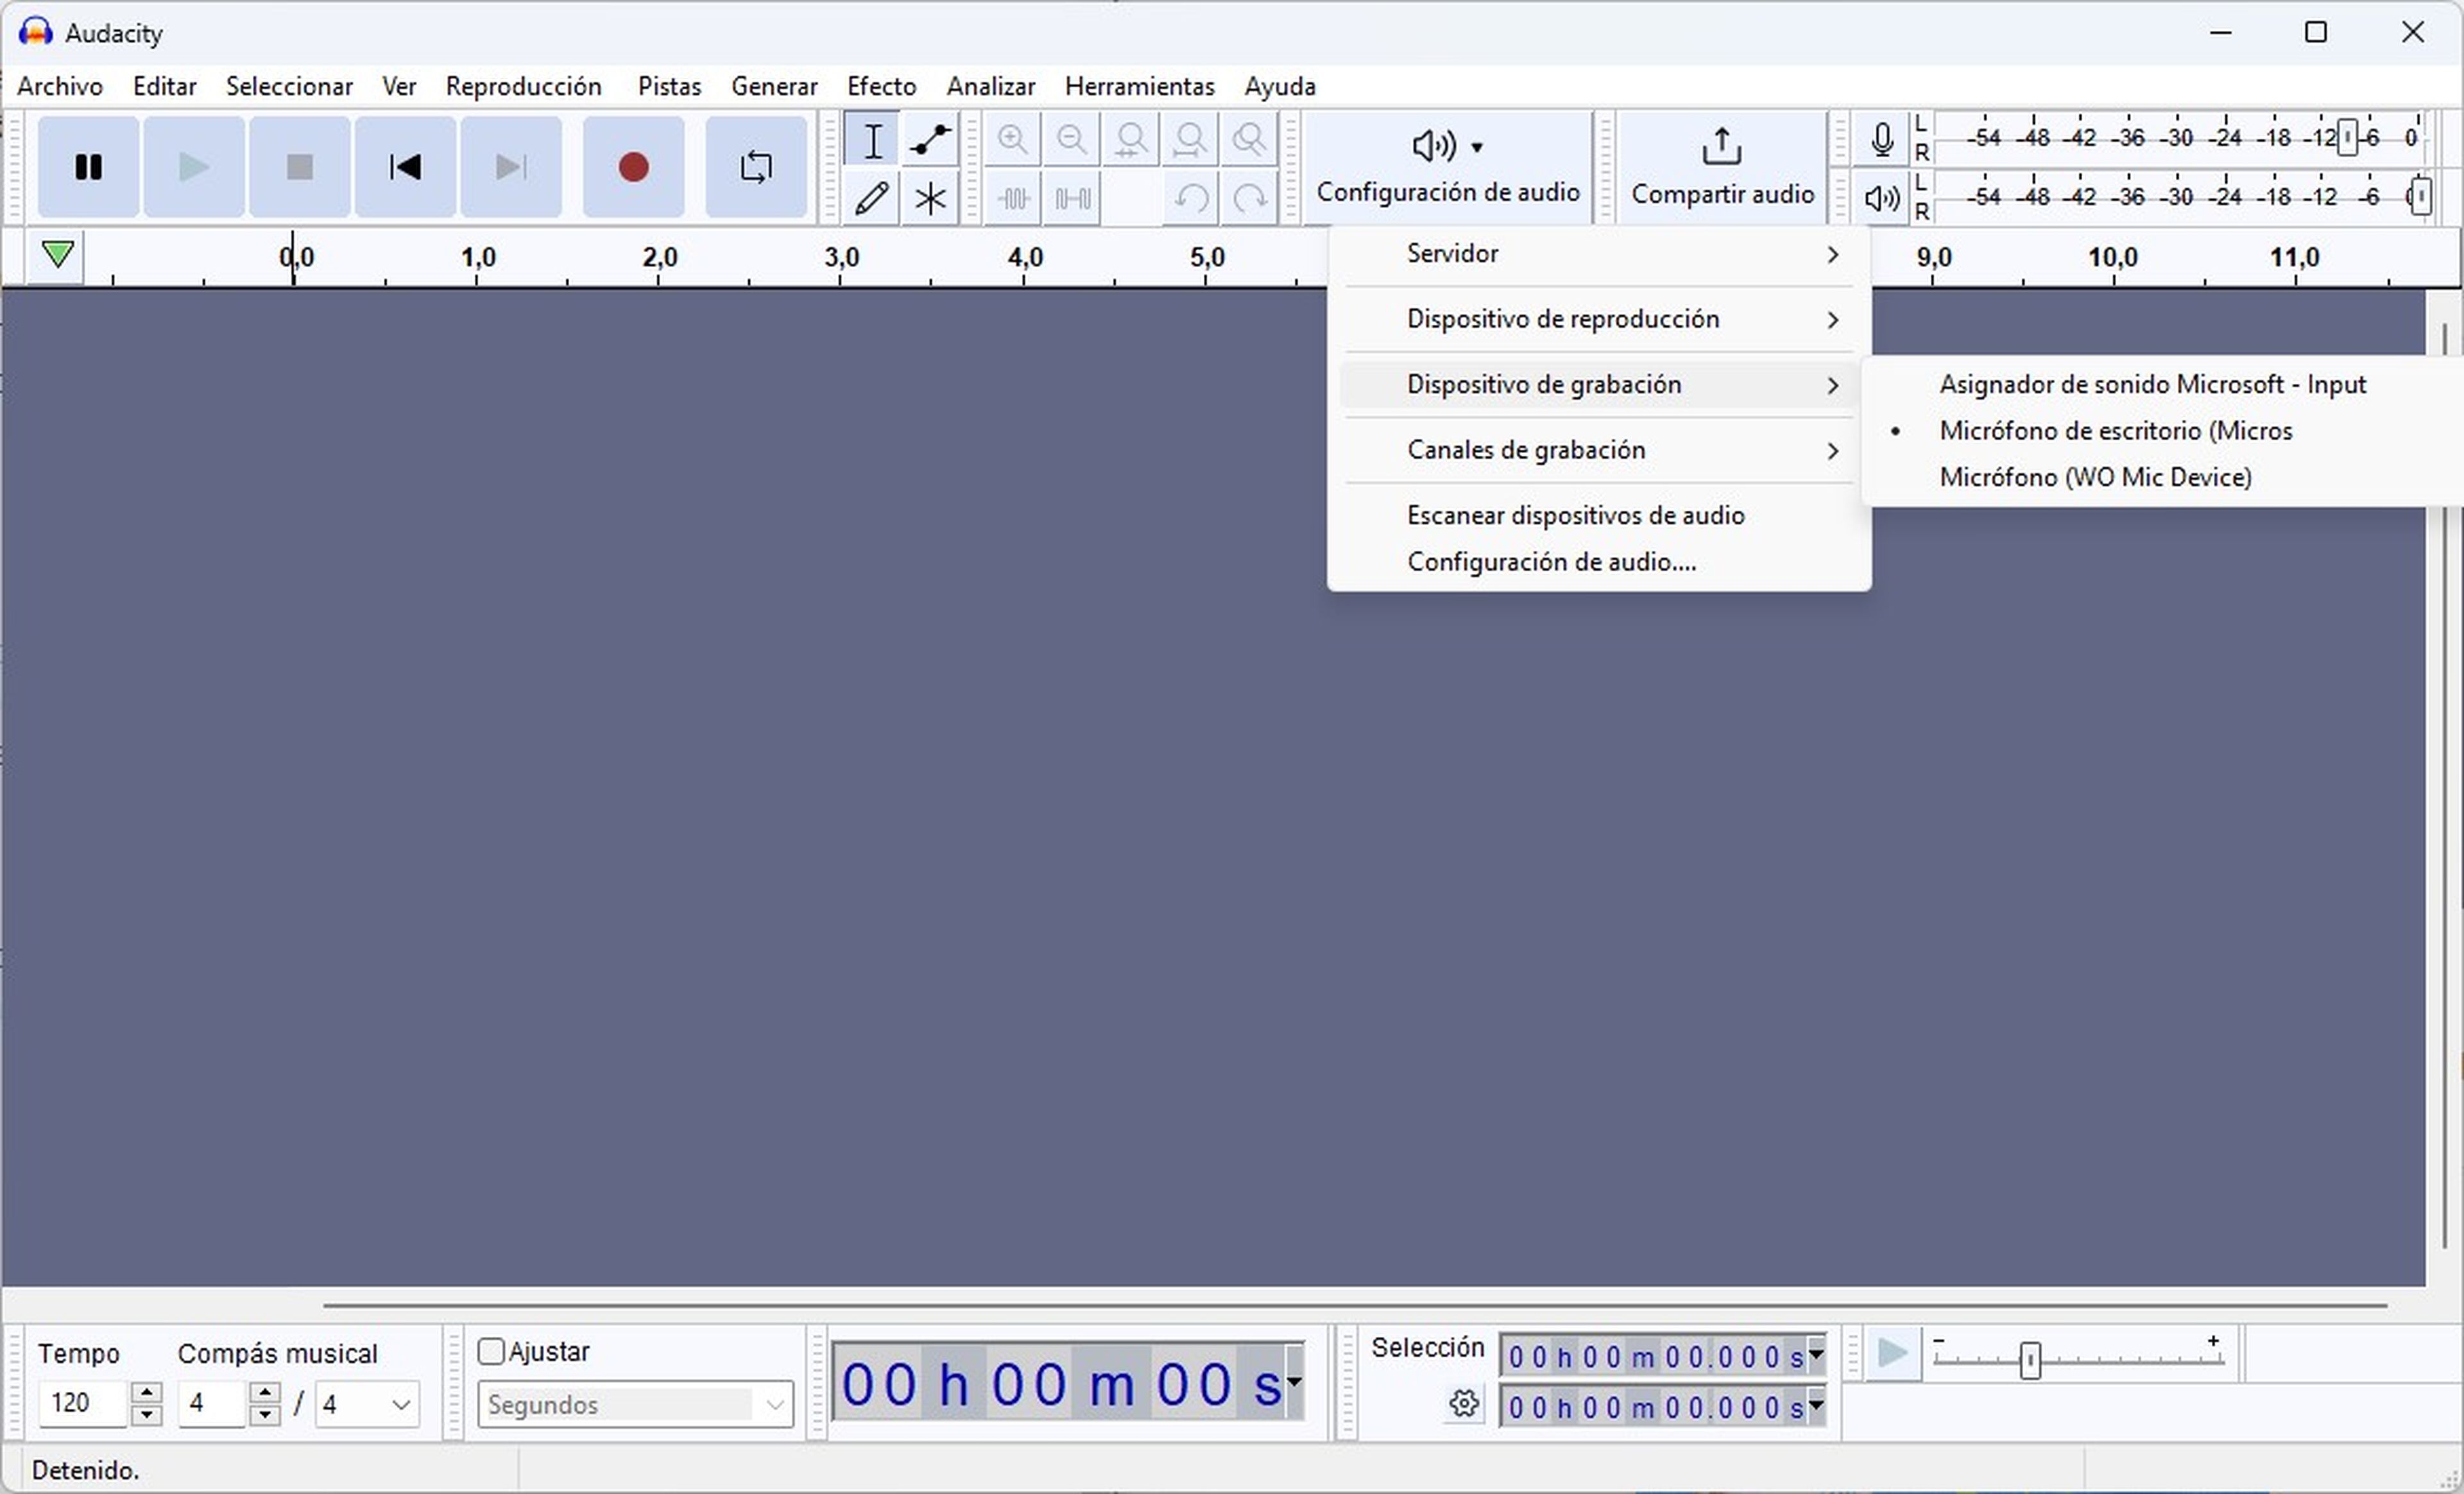
- Open the program and select Audio settings and Recording devicesthis to select the microphone you want to use.
- To start recording, you just have to click on the red button in the top menu or simply press the key R. To stop recording press the button Arrest.
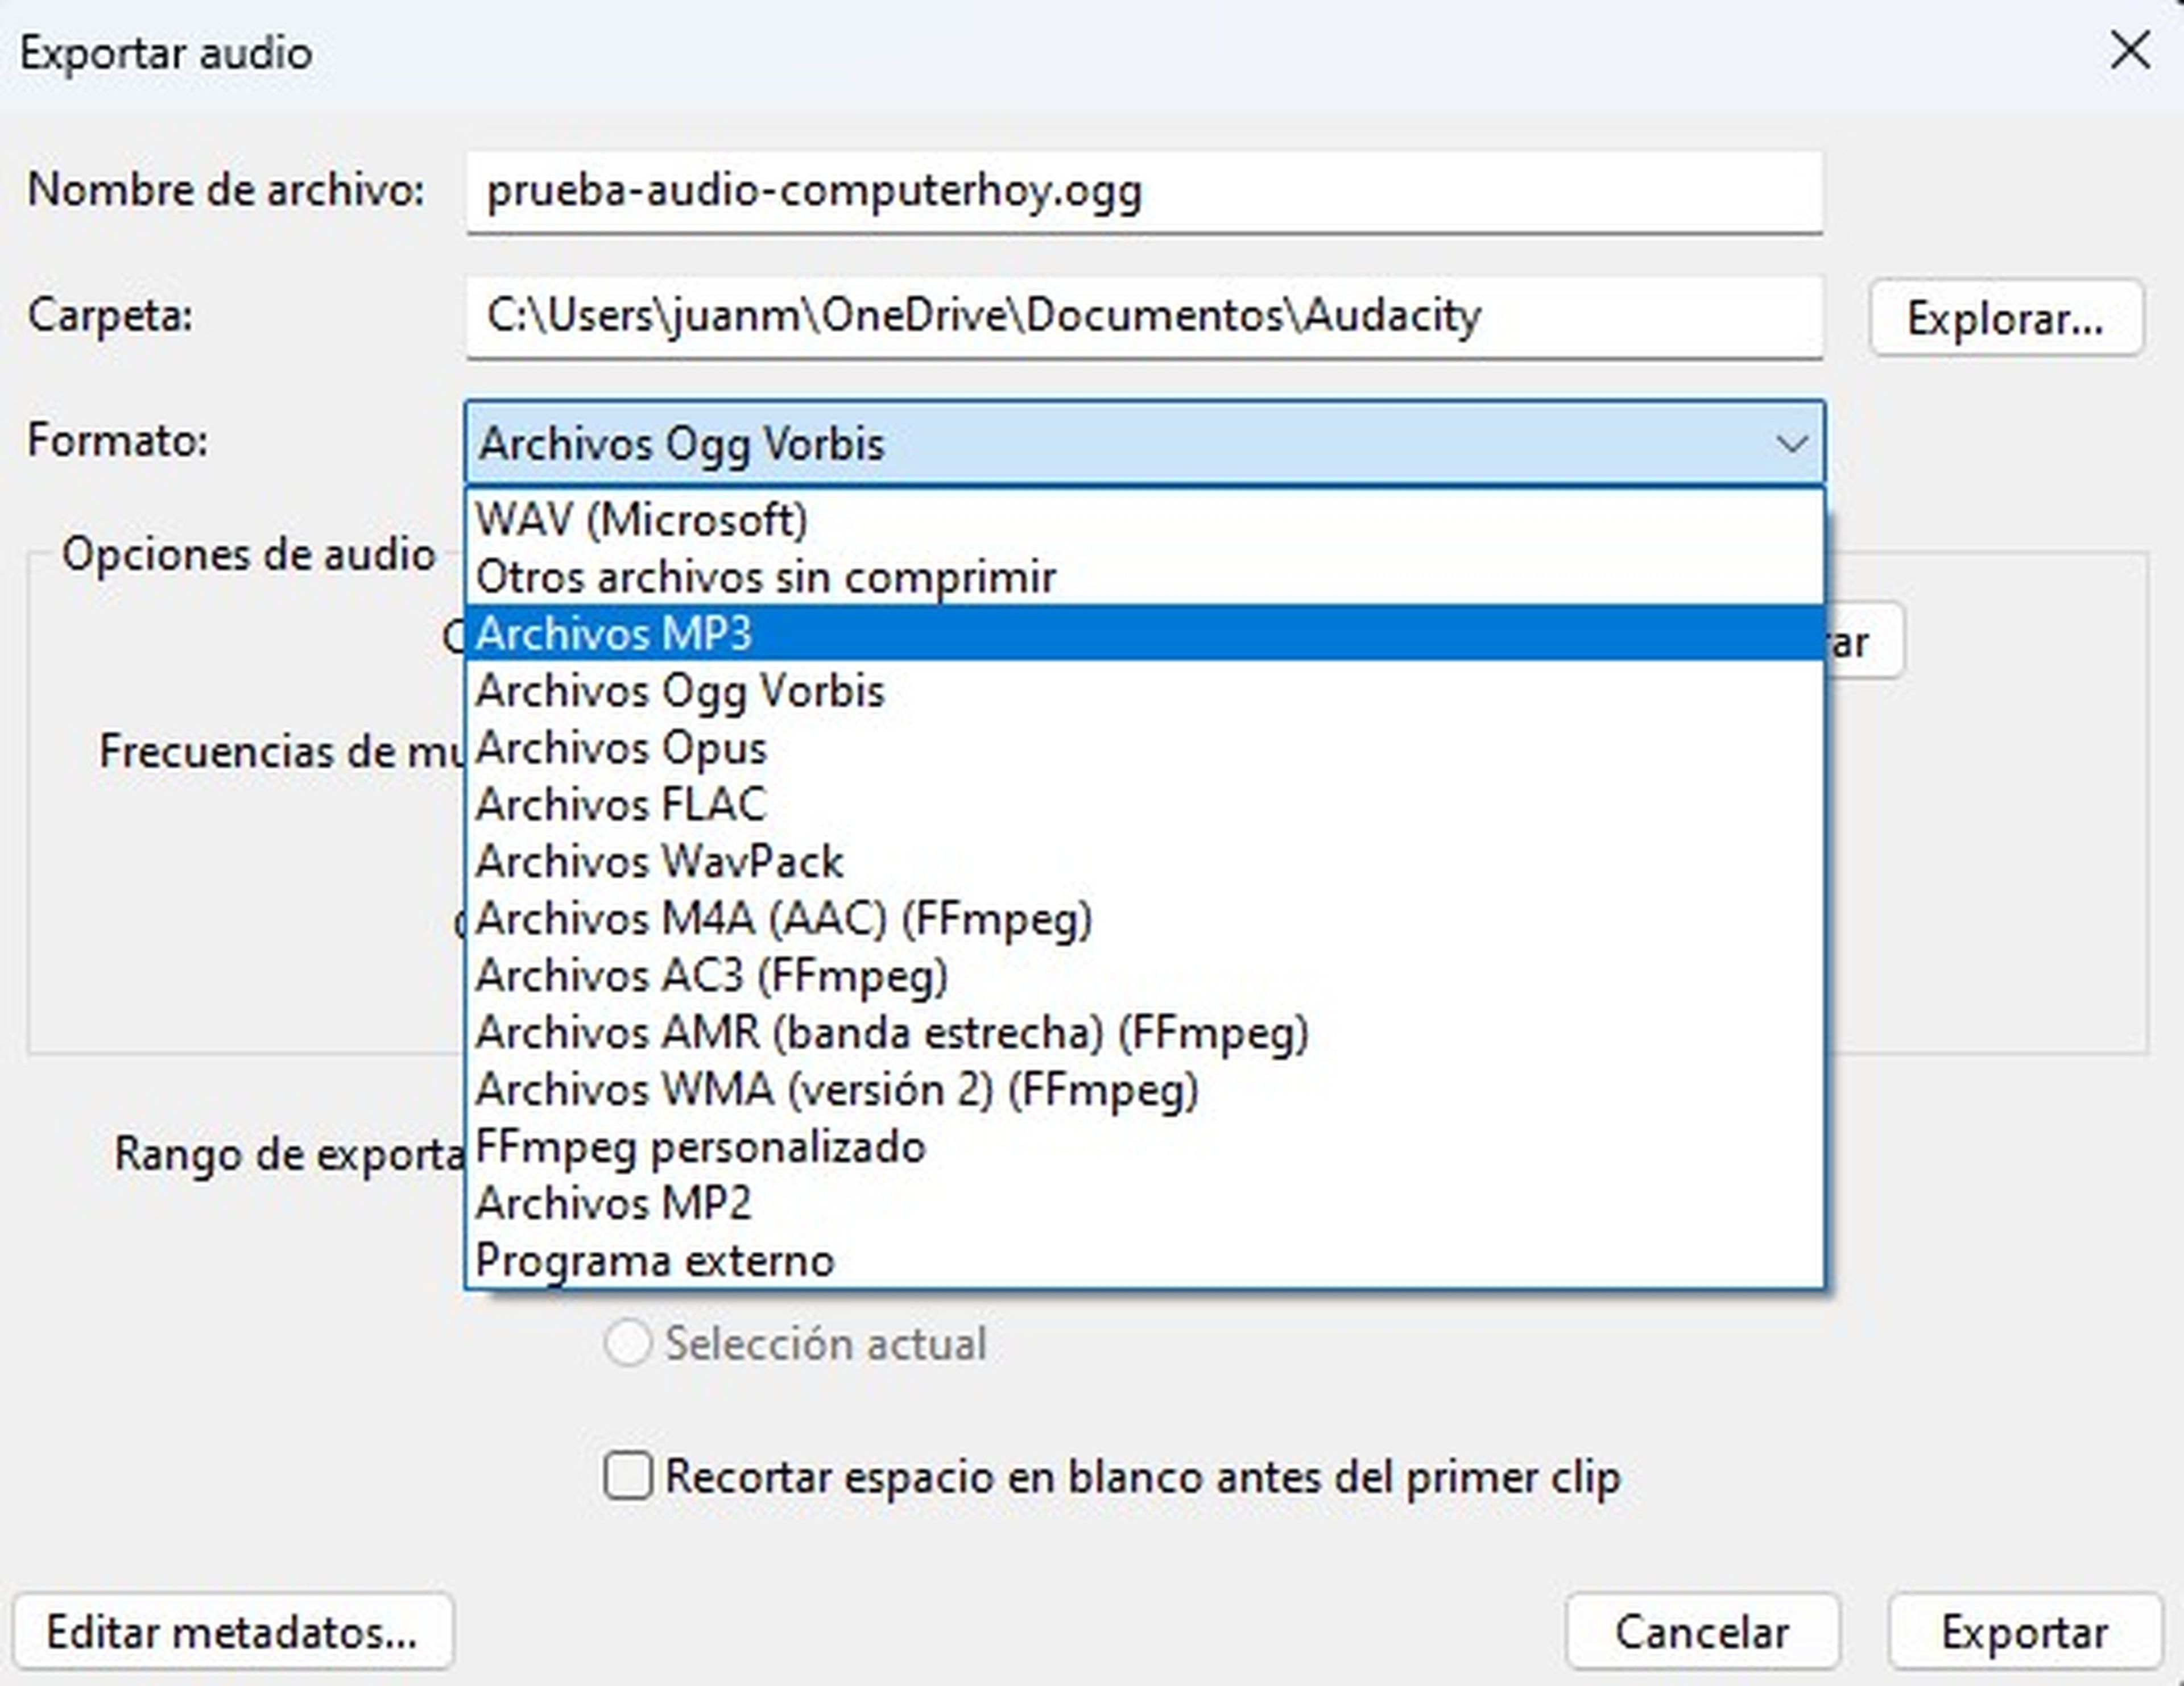
- It should be noted that Audacity does not save recordings automatically, so you must do this manually. To do this, click on Archive and Export audio.
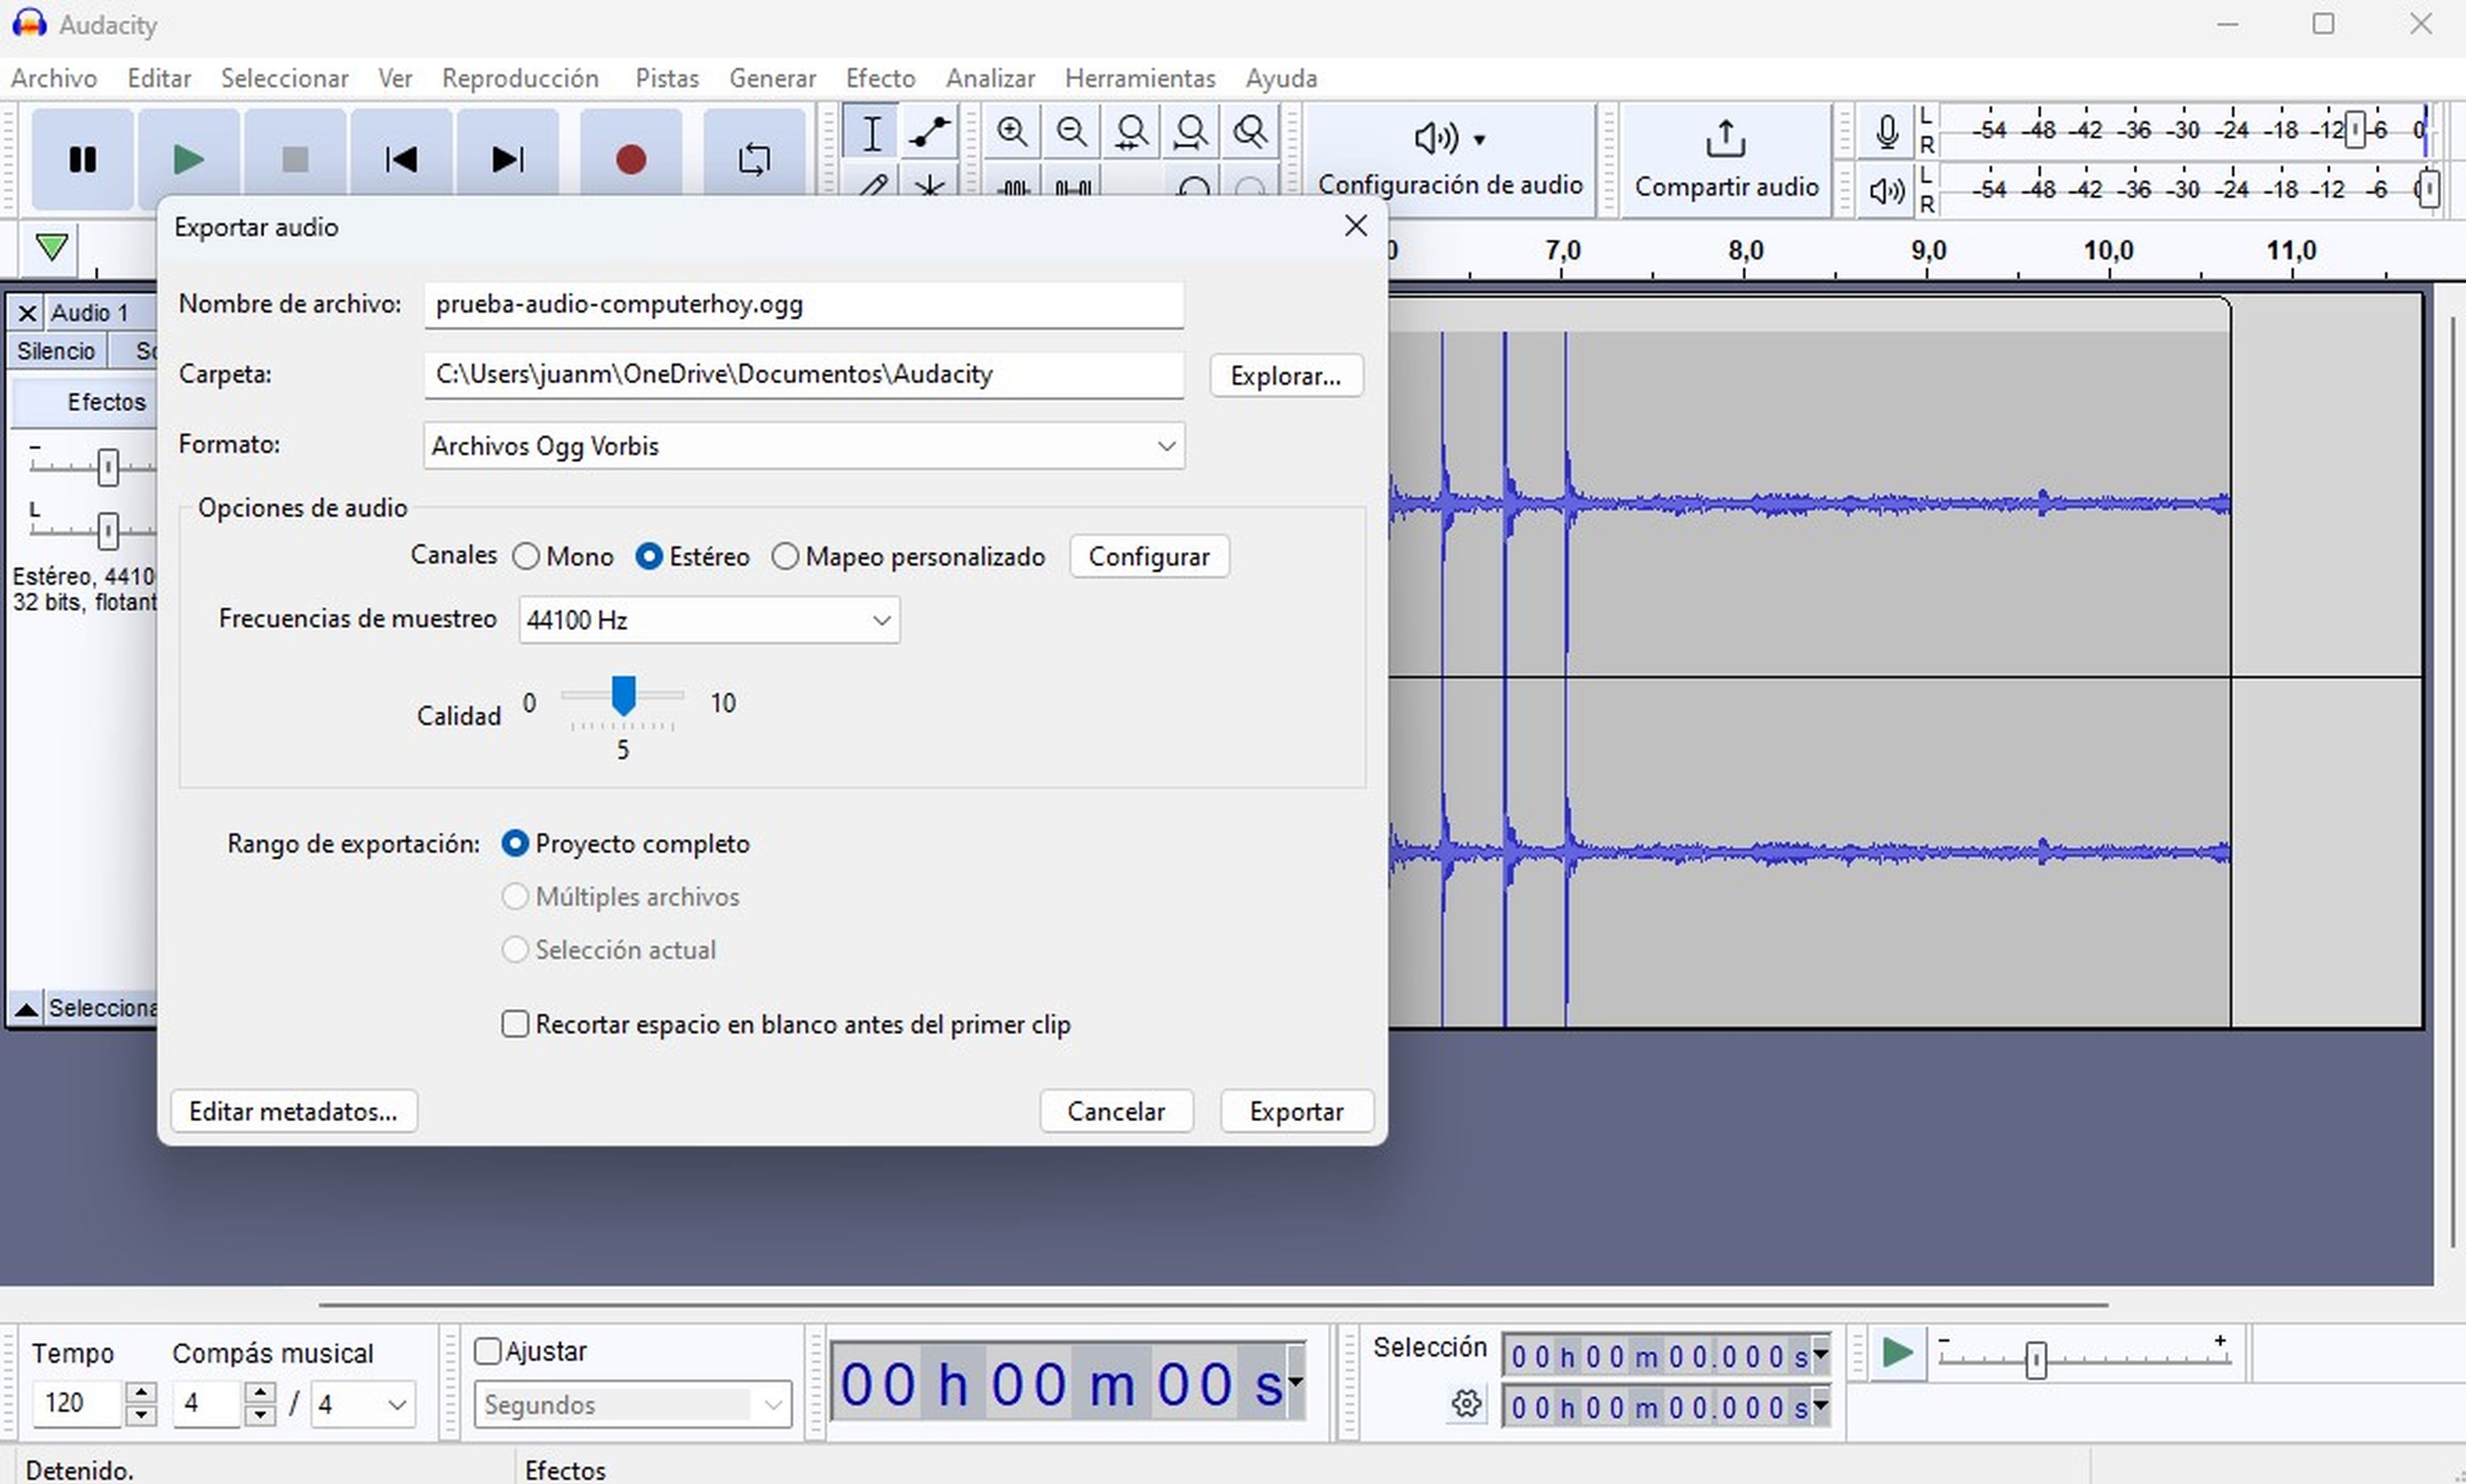
- This will open a new window with advanced functions, where you can give your file a name, select the path where you are going to save it, the audio format, as well as the quality.
- To finish, click Export.
These are two of the best options to record audio on your Windows 11 computer. Both the tool that is integrated into the operating system, which offers you basic but very useful functions, and Audacity, which is a much more advanced program and gratuitous.